A lot of people, I included, are using Gatsby to build their own blogs. One of the things I wanted to add to my blog was a table of contents (ToC) 📝. A ToC will show you all the headings of an article and when you click on a heading it’ll take you directly to that heading. It’s a nice little feature to have on your blog, which makes it easier for users to navigate and find the information they are looking for.
Prerequisite
So before we get started you can find the source code here. In this article, I will be using the gatsby-starter-blog.
# If you don't have the CLI installed, run this command.
npm -g install gatsby-cli

gatsby new my-gatsby-project https://github.com/gatsbyjs/gatsby-starter-blog
If you already have an existing Gatsby site, you can make the changes directly there instead of using this starter.
Plugins
We need to get some extra plugins installed for the ToC to work properly.
yarn add gatsby-remark-autolink-headers gatsby-plugin-emotion
The plugin gatsby-remark-autolink-headers turns all of the headers into anchor links. This means we can link to the
headers.
Emotion
You only need to add the emotion plugin if you want to use emotionjs, which is a css-in-js solution. You will see this later when we look at thetoc.js component.`gatsby-plugin-emotion`,
`gatsby-plugin-smoothscroll`,
{
resolve: `gatsby-transformer-remark`,
options: {
plugins: [
// ...
`gatsby-remark-autolink-headers`,
],
},
},
// ...
Our header elements with the autolinks plugin will now look something like:
<h1 id="header-1" style="position:relative;">
  <a href="#header-1" aria-label="header 1 permalink" class="anchor before"
    >...</a
  >Header 1
</h1>
ToC
First, let’s design the ToC element. This component is just a presentation component, it doesn’t contain any state logic.
import styled from "@emotion/styled"
import React from "react"
import tw from "twin.macro"

const ToC = ({ headings }) => (
  <Toc>
    <Title>Table of contents</Title>
    <InnerScroll>
      {headings.map(heading => {
        if (heading.depth > 4) {
          return <div />
        }

        return (
          <ToCElement key={heading.value}>
            <ToCLink
              href={`#${heading.value.replace(/\s+/g, "-").toLowerCase()}`}
            >
              {heading.value}
            </ToCLink>
          </ToCElement>
        )
      })}
    </InnerScroll>
  </Toc>
)

const Toc = styled.ul`
  ${tw`bg-white fixed hidden lg:flex flex-col rounded p-3 my-3`};
  width: 20rem;
  left: calc(50% + 400px);
  top: 80px;
  max-height: 30vh;
`

const Title = tw.h2`text-2xl mb-2`

const ToCElement = tw.li`p-1 leading-5 ml-4 mb-4 mr-4 leading-3 list-none`

const ToCLink = tw.a`hover:text-black transition duration-300 no-underline`

const InnerScroll = styled.div`
  scrollbar-width: thin;
  scrollbar-color: #367ee9 rgba(48, 113, 209, 0.3);
  overflow: hidden auto;
`

export default ToC
Let’s break this component down. It receives a heading props, which it expects to be a list of the headings
from the markdown documents. A heading is an element starting with #, the more #s the lower the heading, for example:
# Heading 1

## Heading 2

### Heading 3
We use the heading.map which will create an element for each of the headings in the list. If it’s a “heading 5” or lower,
we will simply return an empty div, heading.depth > 4. This is so that the ToC doesn’t become too “big” and
which would make it harder to use/navigate.
const ToC = ({ headings }) => (
  <Toc>
    <Title>Table of contents</Title>
    <InnerScroll>
      {headings.map((heading) => {
        if (heading.depth > 4) {
          return <div />;
        }

        return (
          <ToCElement key={heading.value}>
            <ToCLink
              href={`#${heading.value.replace(/\s+/g, "-").toLowerCase()}`}
            >
              {heading.value}
            </ToCLink>
          </ToCElement>
        );
      })}
    </InnerScroll>
  </Toc>
);
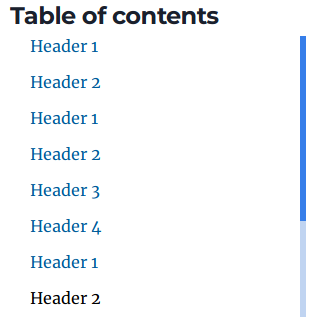
If it’s a heading 1-4, we create a list element (<li>) with a link (<a>) inside of it. This will be a single
heading within our ToC. Below is an example ToC:
The heading data for the ToC above will look something like this:
const headings = [
  {
    value: "Header 1",
    depth: 1,
  },
  {
    value: "Header 2",
    depth: 2,
  },
];
As discussed earlier we are using the autolink headers plugin. This plugin auto-generates anchor links for all of our header. We will use the href attribute to link to these headers in our ToC.
href
The href link we replace all the whitespace with - so "Heading 1" becomes the anchor link #heading-1.
<ToCLink href={`#${heading.value.replace(/\s+/g, "-").toLowerCase()}`}>
  {heading.value}
</ToCLink>
Twin Macro & EmotionJS
Now in the above ToC component, you see elements like <ToCElement>, <InnerScroll> and <ToC>.
Where are these components coming from? Well, this is why I said we need to use the gatsby emotion plugin.
This is the css-in-js components, these components above are twin.macro or emotionjs components.
To use it within our code run the following commands:
yarn add twin.macro @emotion/core @emotion/styled
npx tailwind init
vim package.json
"babelMacros": {
    "twin": {
        "config": "tailwind.config.js",
        "preset": "emotion",
        "dataTwProp": true,
        "debugPlugins": false,
        "debug": false
    }
}
TailwindCSS with Gatsby
Gatsby have a good tutorial here, on how to integrate TailwindCSS with a Gatsby site.The twin.macro library allows us to use TailwindCSS. Tailwind provides us with
many pre-generated classes that we can then leverage within our code. Here I am assuming you are somewhat familiar with how it works.
const Toc = styled.ul`
  ${tw`bg-white fixed hidden lg:flex flex-col rounded p-3 my-3`};
  width: 20rem;
  left: calc(50% + 400px);
  top: 80px;
  max-height: 30vh;
`;

const Title = tw.h2`text-2xl mb-2`;

const ToCElement = tw.li`p-1 leading-5 ml-4 mb-4 mr-4 leading-3 list-none`;

const ToCLink = tw.a`hover:text-black transition duration-300 no-underline`;

const InnerScroll = styled.div`
  scrollbar-width: thin;
  scrollbar-color: #367ee9 rgba(48, 113, 209, 0.3);
  overflow: hidden auto;
`;
This is how we can style the scrollbar. The first colour is the colour of the scrollbar and the second colour is the the background colour of the scrollbar.
const InnerScroll = styled.div`
  scrollbar-width: thin;
  scrollbar-color: #367ee9 rgba(48, 113, 209, 0.3);
  overflow: hidden auto;
`;
div
Gatsby have a good tutorial here, on how to integrate
The styled.div this means InnerScroll when translated to HTML code will be <div>.
<div class="css-91zyin-InnerScroll eqpue8b4">
  <li class="css-12965kf-ToCElement eqpue8b2">
    <a href="#header-1" class="css-14n9u33-ToCLink eqpue8b3">Header 1</a>
  </li>
</div>
Another interesting component to look at is the ToC. This combined twin.macro and emotionjs
so width CSS is using emotionjs and we are using twin.macro with {tw…}. Where we fill in
the tw with the tailwind styles we want to apply. In the example below, fixed will make
the position of the element fixed.
const Toc = styled.ul`
  ${tw`bg-white fixed hidden lg:flex flex-col rounded p-3 my-3`};
  width: 20rem;
  left: calc(50% + 400px);
  top: 80px;
  max-height: 30vh;
`;
Global Style
One small change we need to make to allow our scrolling to be smoother is in our global styles,
whether that should be a CSS file or a css-in-js etc. In this example, it’ll be the style.css file that comes with
the start. We need to add the following properties:
html {
  scroll-behavior: smooth;
  // ...
}
This CSS property will stop the scrolling from feeling jerky and instead will be far smoother. So instead of jumping to the header, we click on a header in the ToC and it’ll scroll smoothly to that header.
Blog Template
Finally, we need to add the ToC element to our blog template.
Gatsby Node
Remember that with Gatsby in the gatsby-node.js file, we can create a new page for each markdown file found. Here
is the logic that creates a page for each markdown file found by the markdown-remark plugin. As you can see, we use
blog-post.js file as the template for each of our blog posts.
exports.createPages = async ({ graphql, actions, reporter }) => {
  const { createPage } = actions;

  // Define a template for blog post
  const blogPost = path.resolve(`./src/templates/blog-post.js`);

  // Get all markdown blog posts sorted by date
  const result = await graphql(
    `
      {
        allMarkdownRemark(
          sort: { fields: [frontmatter___date], order: ASC }
          limit: 1000
        ) {
          nodes {
            id
            fields {
              slug
            }
          }
        }
      }
    `
  );

  const posts = result.data.allMarkdownRemark.nodes;

  // Create blog posts pages
  // But only if there's at least one markdown file found at "content/blog" (defined in gatsby-config.js)
  // `context` is available in the template as a prop and as a variable in GraphQL

  if (posts.length > 0) {
    posts.forEach((post, index) => {
      createPage({
        path: post.fields.slug,
        component: blogPost,
      });
    });
  }
};
Gatsby Config
To allow the remark plugin to “see” the markdown files, we need to source them. There are a few ways to do this,
I normally use git to source my plugins. In this case, we will add all
the markdown files in the content/blog folder.
{
    resolve: `gatsby-source-filesystem`,
    options: {
        path: `${__dirname}/content/blog`,
        name: `blog`,
    },
}
Blog Post
So now back to our blog-post.js, let us add our ToC component to the blog post template.
import ToC from "../components/toc";
// ...

const post = data.markdownRemark;
return (
    <Layout location={location} title={siteTitle}>
        <article className="blog-post" itemScope itemType="http://schema.org/Article">
            <ToC headings={post.headings} />
        </article>
    </Layout>;
)
Let’s also adjust the GraphQL query so we can get the heading data that the ToC component requires.
Add the headings field to get the value and the depth fields.
markdownRemark(id: { eq: $id }) {
    id
    excerpt(pruneLength: 160)
    html
    headings {
        value
        depth
    }

    frontmatter {
        title
        date(formatString: "MMMM DD, YYYY")
        description
    }
}
That’s that we added a ToC to our Gatsby Site. We can a bunch of other things to improve it. Such as styling it to make it look better. I also hide my ToC when the width decreases. So you only see a ToC when browsing the site on a Laptop/Desktop.